Eventleaf How To Guides

How to associate an event session with a registration option

When organizing huge events with multiple sessions, it's easy to get lost in event management and event organization. Keeping a watchful eye on attendees and ensuring they get what they paid for is critical for organizing a successful event.

Eventleaf is an event management platform that allows you to associate different sessions with the attendee's registration quickly. Instead of manually sorting through the data to assign sessions, Eventleaf will assign attendees access based on the options they select during registration.

This tutorial will demonstrate how to associate a session with a registration option so that attendees can select the sessions they are interested in attending during registration. You can link a session to a registration option in two different ways. Both methods are described below.

Steps

Method 1: Associate a session with a registration option

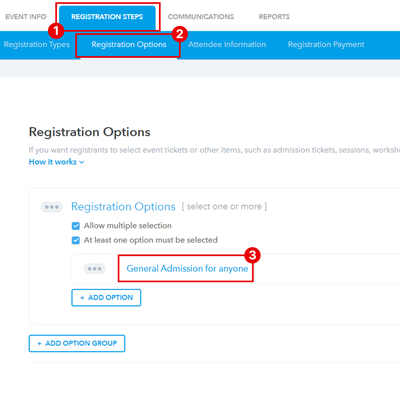
  1. Go to "Registration Steps > Registration Options" and click on a registration option to view it's settings.

    Registration Option
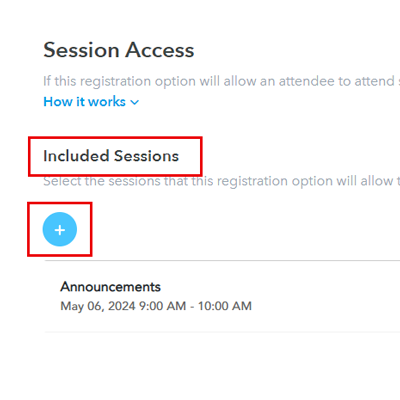
  2. In the settings window, scroll to the "Session Access" section and click on the "+" icon under "Allowed Sessions".

    Session Access
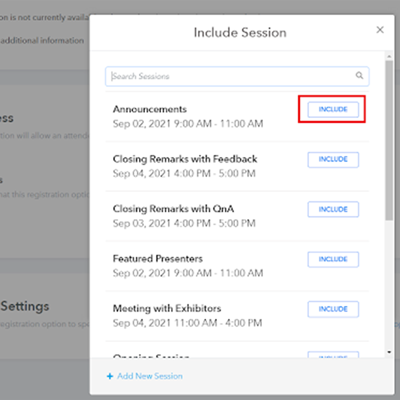
  3. Click the "Include" button next to the session to be included.

    Include
  4. Repeat this process for additional sessions, if necessary.

Method 2: Associate a registration option with a session

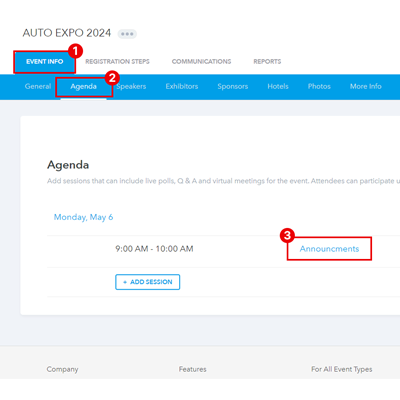
  1. Go to "Event Info > Agenda" and click on a session to view it's settings.

    Session Settings
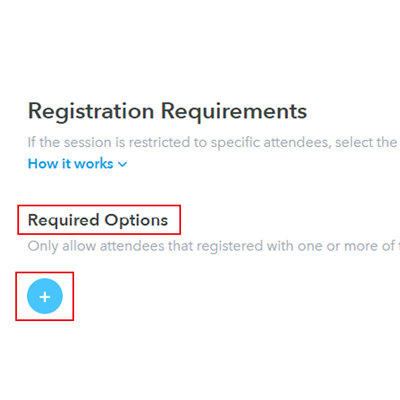
  2. In the settings window, scroll to the "Registration" section and click on "+" icon under "Allowed Registration Options".

    Allowed Registration Options
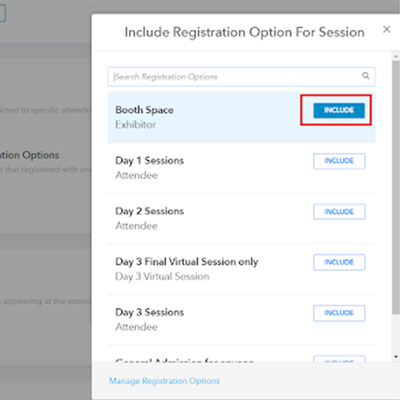
  3. Click the "Include" button next to the registration option to be included.

    Agenda/Session
  4. Repeat this process for additional registration options, if necessary.