-
1. Prerequisites
An active Eventleaf account.
Define the type of contributors you're seeking, such as speakers, panelists or exhibitors.
Names and emails of reviewers who would assess and approve, improve or reject the proposals.
-
2. Setting Up an Abstract Project
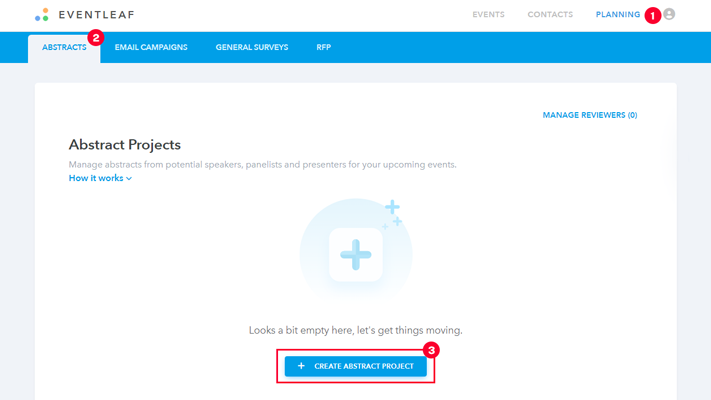
Login to Eventleaf and click on Planning in the top right corner of the page. The page should default to the Abstracts page. If it does not, click on Abstracts.
-
To create a new Abstract Project click on the "+" icon and give your abstract project a name.
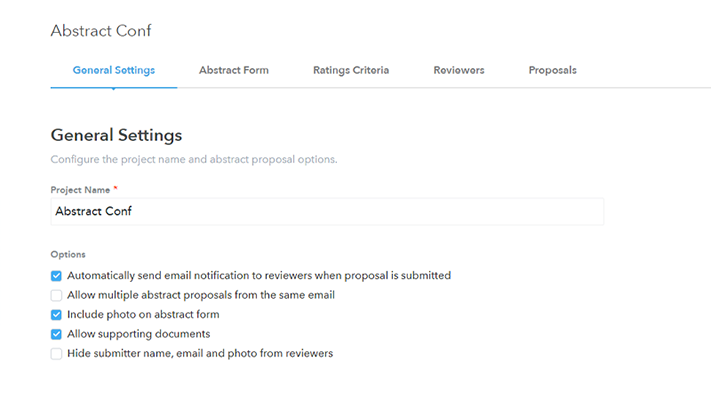
Upon successful Abstract creation, the system redirects you to the General Settings page where you can configure and automate the abstract management process.
-
Select the appropriate options for your abstract project.
-
Automatically send email notification to reviewers when proposal is submitted: An email will be sent notifying reviewers assigned to this abstract project of a new submission.
-
Allow multiple abstract proposals from the same email: A user may submit more than one abstract proposal using the same email.
-
Include photo on abstract form: When enabled, users may upload a photo with their abstract proposal. Photos should be either a jpg or png file.
-
Allow supporting documents: When enabled, users may upload a document with their abstract proposal. Documents can be pdf, doc(x), ppt(x), or pps(x).
-
Hide submitter name, email and photo from reviewers: The abstract proposal submitter information will not be shown to reviewers assigned to the abstract project.
-
-
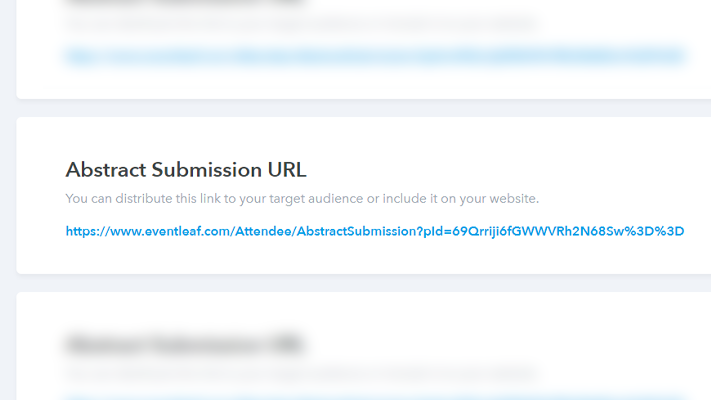
Abstract Submission URL: At the bottom of the General Settings screen, you will find the URL that you can share with your audience or include on your event's website.
-
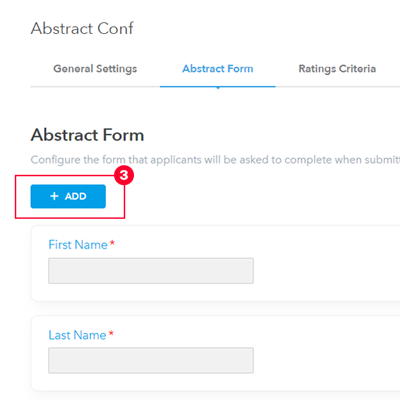
3. Creating an Abstract Form
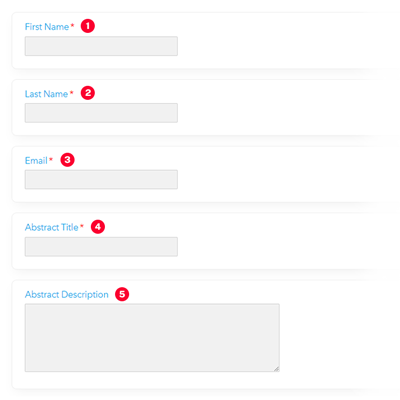
Click on Abstract Form. This is the form that applicants will be asked to complete when submitting an abstract. The default fields are First Name, Last Name, Email, Abstract Title, and Abstract Description. All of these fields with the exception of Abstract Description are required fields.
-
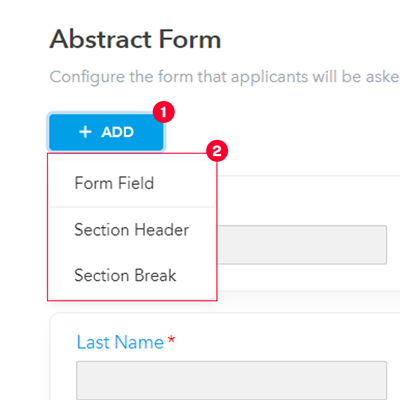
Click on the "+ADD" button to add additional Form Fields or to add a Section Header or Section Break to the Abstract Form.
-
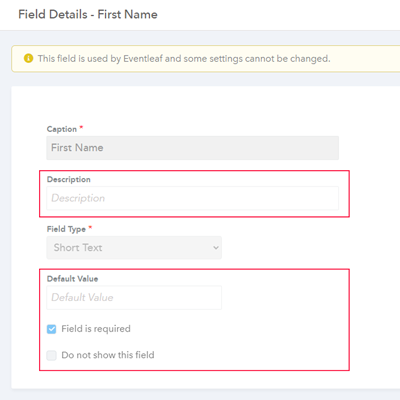
Customizing Default Form Fields: Click on the name of the field that you want to customize. This brings up a screen that you can use to customize that field.
-
While you cannot modify the default fields, you can add short descriptions to each field, enter a default value, or make the field optional or hidden.
-
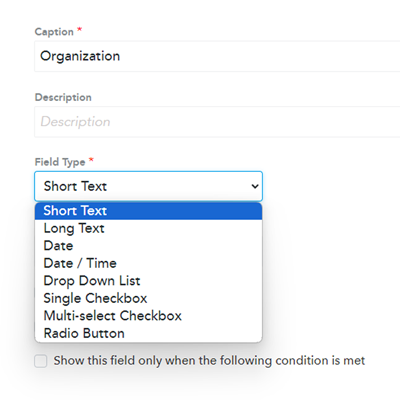
4. Adding Fields to the Abstract Form
-
Click the +ADD button to add a form field, section header or section break to your abstract form.
-
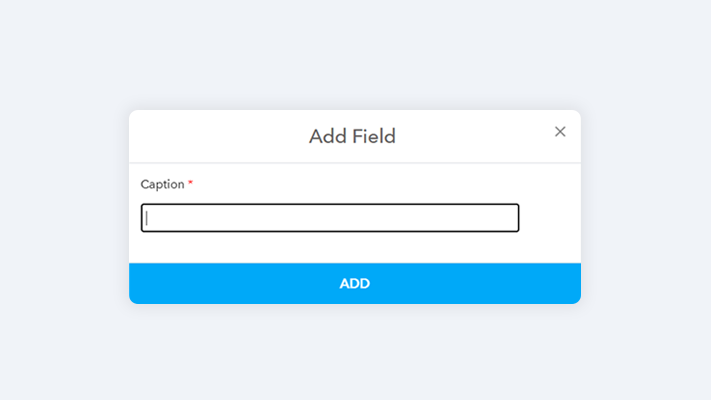
Enter a name for the new field and click add. You can change the name later on.
-
On the next screen, you can modify the field's name, add a description, select the field type, and enter a default value where required.
-
The following field types are available to add to an abstract form: Short Text, Long Text, Date, Date / Time, Drop Down List, Single Checkbox, Multi-select Checkbox, or Radio Button.
-
Short Text and Long Text field types: These fields will add either a short text field or long text field to the form.
-
Date and Date / Time field types: Select the Date Format you desire for the field.
-
Drop Down List: Enter the drop-down values you want in the box labeled "New Value" and click "ADD". Alternatively, a list of drop-down values can be imported by clicking on the ellipses under the New Value text box.
If there is a default value you would like to be automatically selected, select it from the Default Value drop down.
-
Single Checkbox: This will create a field with a single checkbox option that can be selected. Enter the value for the checkbox in the Checkbox Text field. Select the default value whether you wish for the checkbox to be checked by default or unchecked.
-
Multi-select Checkbox: This field allows you to display multiple options as checkbox options and this allows a user to select one or more of the options. The system also includes the ability to include an "Other" option which gives the user a text field to type their answer into.
-
Radio Button: This field allows you to display multiple options as Radio Buttons where only one value is selectable by the user. The Radio Button field type also allows for an "Other" option which gives the user a text field to type their answer into.
-
-
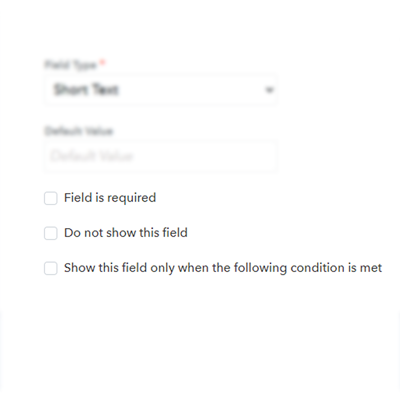
All Form Fields include three options near the bottom of the page that you can select if needed.
-
Field is required: This makes the Form Field a field that the user must select or enter a value on in order to complete and submit the form.
-
Do not show this field: This hides the field from the form. You can select this if you decide to remove a field from a form after it has been added or if you have a field you want to add at a later date but do not wish for it to be included initially.
-
Show this field only when the following condition is met: This option is useful in creating fields that are dependent on another field's value being equal to or not equal to the value specified here. You can set the conditions for this option to any field on the form, including email addresses. For instance, if you have a Yes - No question and you want to ask a secondary question when the answer is No, you will use this option.
-
-
You can also organize your Abstract Form into segments or sections by adding Section Headers or Section Breaks.
-
-
5. Customizing Abstract Rating Criteria
Reviewers that you assign to an abstract project rate the abstract submissions by giving a star rating out of 5 stars for the ratings criteria you choose.
For example, one of your ratings criteria might be "Relevance" and a reviewer could rate a submission as 4 out of 5 stars for relevance. A cumulative rating score will be shown for each reviewer.
-
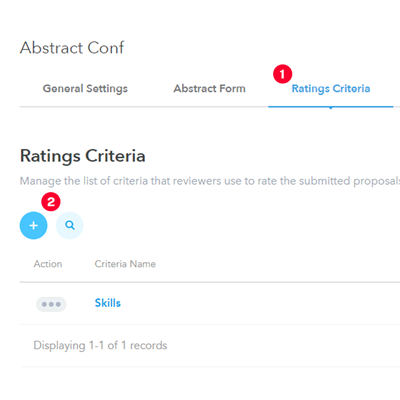
To specify the abstract ratings options, click on Ratings Criteria. There will be a default ratings criterion of "Skills". You can either use this as is or rename it to a criterion more relevant to your abstract rating process.
-
To add additional Ratings Criteria, click on the "+" icon and enter the name for your Criteria. There is no limit to the number of criteria that you can enter.
-
-
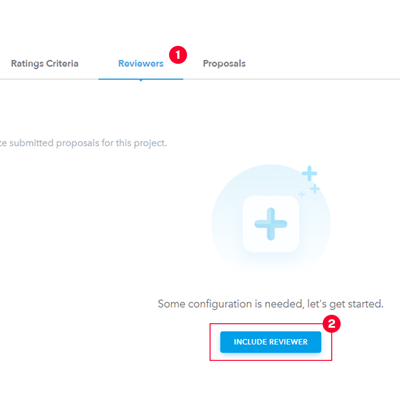
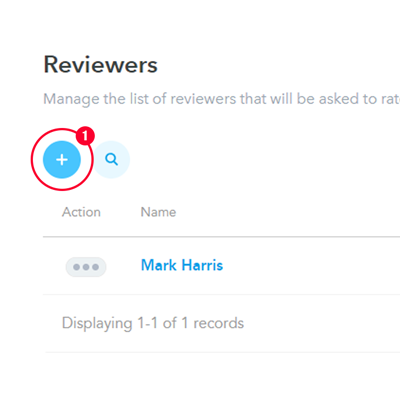
6. Adding Reviewers
-
To assign Reviewers to an Abstract Project, you can either go to the Reviewers tab and click on the "INCLUDE REVIEWERS" button, select "+ Add New Reviewer" and then enter the email for the new reviewer and click Next, or if you already have reviewers entered, click on the "+" icon and select a reviewer or enter a new reviewer.
-
Additionally, abstract reviewers can be entered on the main Abstract Projects page by clicking on "MANAGE REVIEWERS".
-
-
7. Abstract Submission
-
Now that you have your Abstract Form, Ratings Criteria, and Reviewers setup, you can invite candidates to submit proposals via email or your website using the submission link. However, first you should preview the submission form that will be sent to the respondents by clicking VIEW SUBMISSION PAGE.
-
To find the submission link, click on General Settings and scroll to the bottom of the page.

-
When an abstract is submitted, all reviewers assigned to the abstract project will be notified via email. Th email will include a link for the reviewer to click on to access the abstract for review.
-
-
8. Abstract Reviewing
-
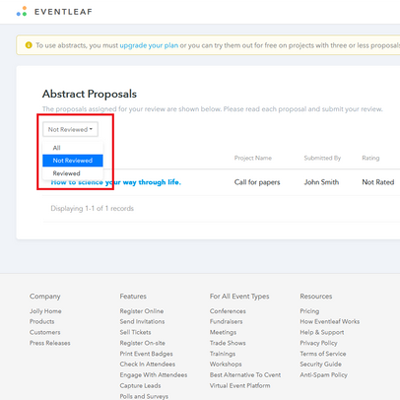
When a reviewer logs into the Abstract Reviewer Dashboard, they will see all abstracts that they have not yet reviewed. They can change the filter to show only those that have been reviewed or all abstracts regardless of review status.
-
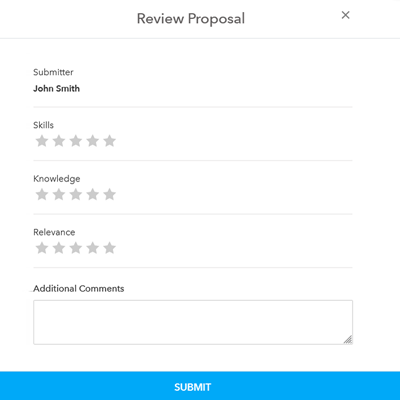
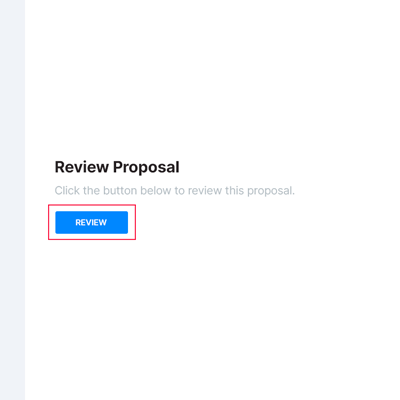
To review a proposal, click on the abstract title, view the abstract information including any uploaded documents, and then click on the Review button. On the Review Proposal pop up, the reviewer can give a 1-5 star rating to each of the criteria as well as enter any comments they may have about the proposal.
-
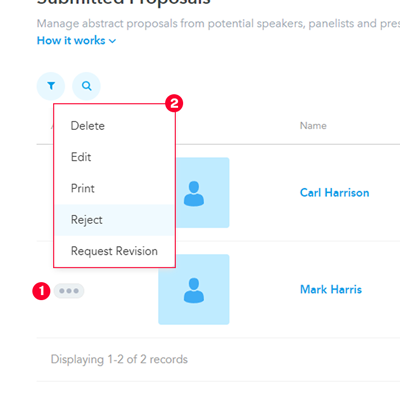
During the review process or once the review process is complete, event administrators can go through and either "Accept", "Reject", or "Request Revision" of an abstract submission. With each of these options, the submitter will be notified via email of the status of their submission. If Request Revision is selected, the submitter will be sent an email with a link to edit their proposal.
-
Once the abstract review process is complete, abstracts can be imported directly to an event as speakers or exhibitors. Alternately, they can also be exported and then imported as sessions using the session import file.
-