-
Before you start
- The right plan. You need the Ultimate plan with the API access add-on.
- API turned on for your account. API access is disabled by default. Contact Eventleaf support to enable it for your account.
- Owner access. Only the account owner can create API keys. If you don't see API Access in the profile menu, ask your account Owner.
-
Creating your API key, step by step
1. Open API Access
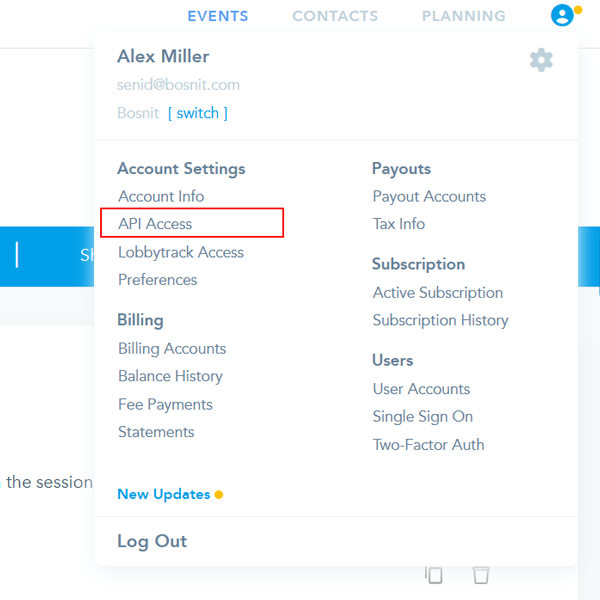
Log in to Eventleaf. Select the profile icon at the top right. Under Account Settings, select API Access.
2. Create a new key
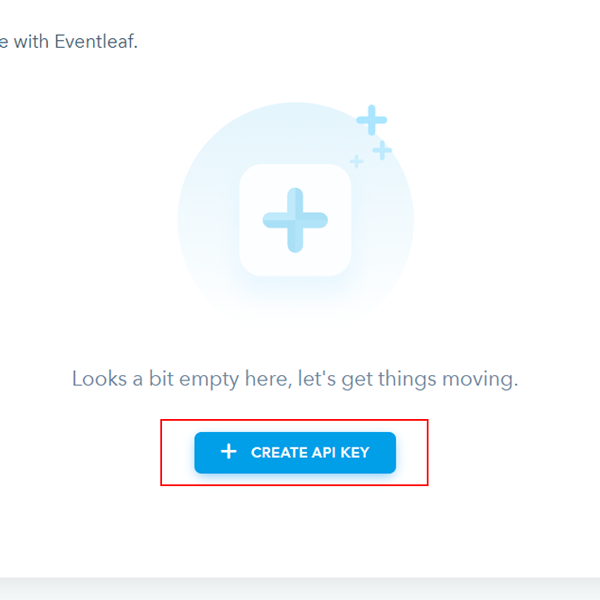
The API page opens. Select the blue + button.
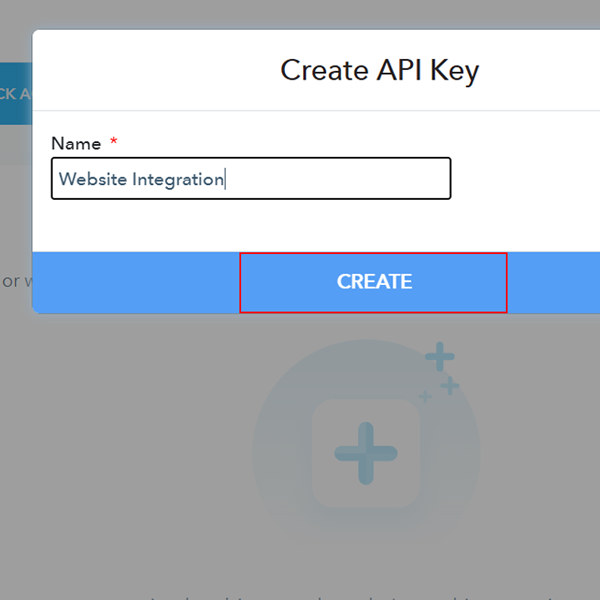
Enter a name for your key, for example, "Website integration." Then select CREATE.
3. Copy your API key
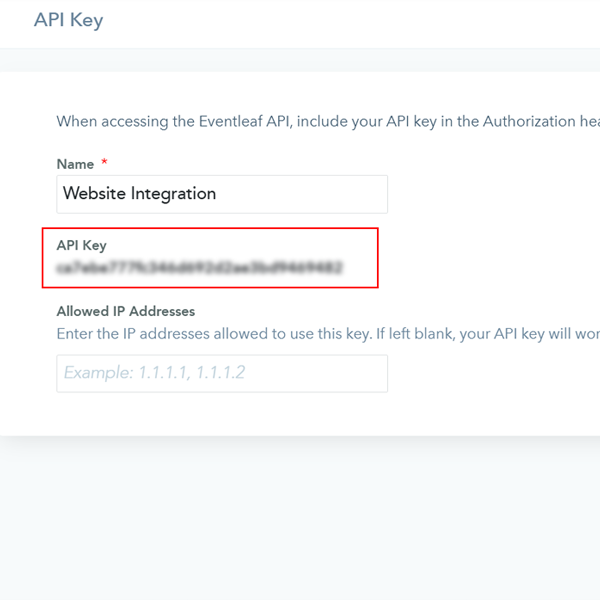
A side panel opens with your new key under API Key.
Allowed IP Addresses is optional. If you leave it blank, the key will work from any IP address.
If, however, you want to limit the key to your servers, you can enter their IP addresses here, separated by commas.
Important: Treat the key like a password. Anyone who has it can read your event and attendee data. Do not put it in public web pages, emails, or shared documents.
4. Open the API docs and try a request
Navigate back to the API Access page from your settings.
Then, select the Eventleaf API link.
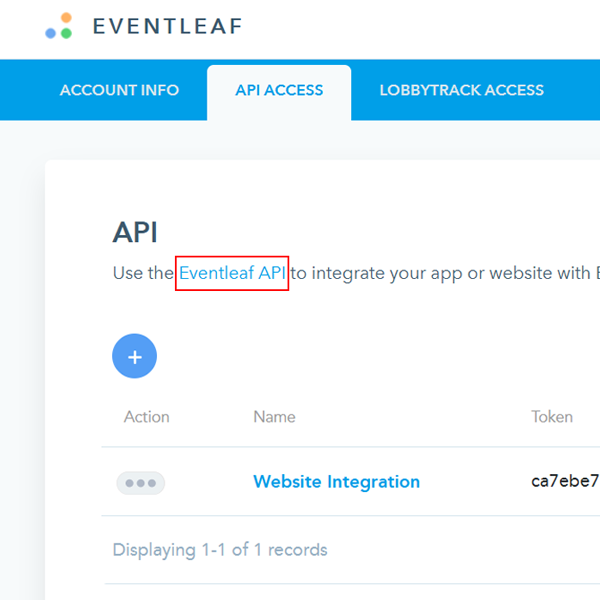
This opens the API docs at api.eventleaf.com/swagger/ui/index.
- Select Events, then select GET /api/v1/events.
- Paste your key into the Authorization field.
- Select Try it out!
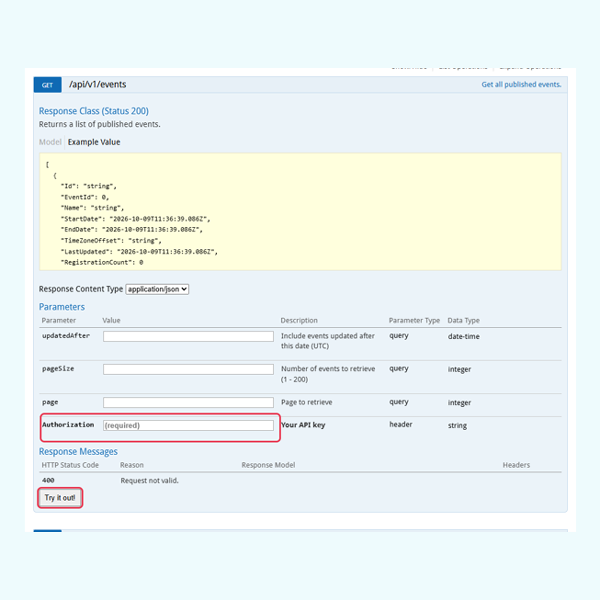
5. Check the response
Response Code shows 200. Response Body lists your published events, with each event's ID, name, dates, and registration count.
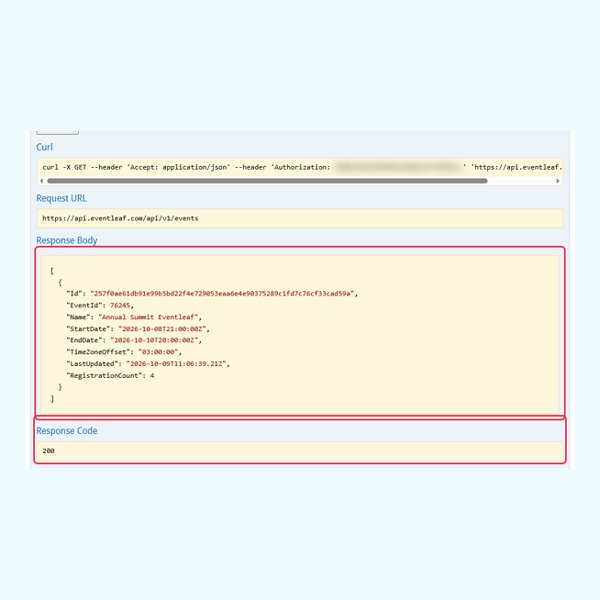
The Curl box above shows the same request as a command. Developers can run it from a terminal:
curl -H "Authorization: YOUR_API_KEY" https://api.eventleaf.com/api/v1/events -
Pro tip: Use one key for each application that needs to be integrated
Create a separate key for each app or integration, and name it after that app.
If one key leaks, or you stop using an app, you should delete only that key. Here are the steps to delete:
- Select ••• next to the key.
- Select Delete, then select Delete again to confirm.
The key stops working at once, and your other apps keep running.