-
1. Adding Attendee Types
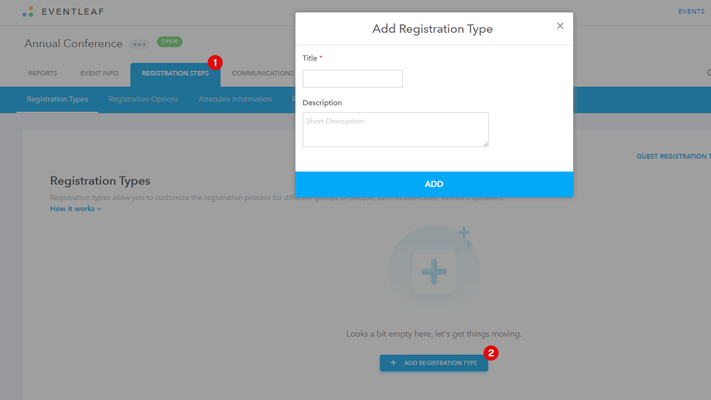
Click on the REGISTRATION STEPS tab and go to Registration Types
-
Add a Registration Type for each type of attendee for your event.
-
In the Registration Type settings, select whether you want to allow the registration type to bring guests and then optionally define Guest Registration Types. This allows you to control which form fields and attendee registration options will be available to guests.

-
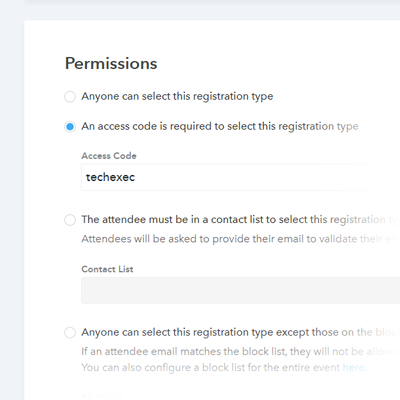
Under Permissions, set the permission level you want for selection of this Registration Type. You can allow everyone to register or you can:
Require a code that must be entered to register as a certain attendee type, for example, Executive or VIP
Restrict the registration to only the people on the mailing list you attach
-
Allow everyone to register except people on a watchlist
-
2. Defining Registration Option Groups
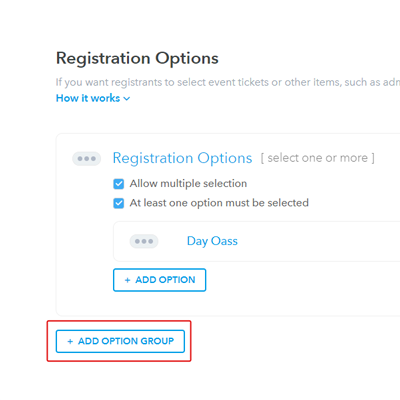
Registration Options determine the type of tickets, passes, and access levels you will offer at your event. These can include tickets or other items, such as admission passes, sessions, workshops and tours that the registrant can select during registration.
-
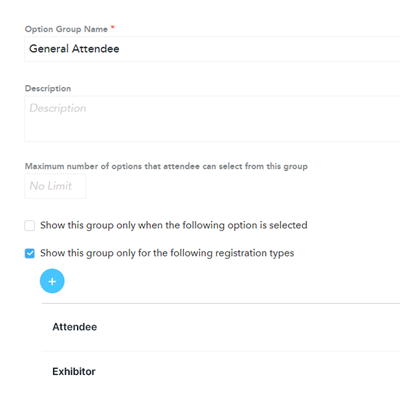
Define Registration Option Groups: For large or complex events, you should start by defining the Registration Option Groups that will shape your event experience. Each Group may hold multiple registration options and can be shown only to the intended type of attendees, while being hidden from other types of attendees.
-
You can also create a child relationship to another Registration Option Group as the parent.
-
For example, you can define one Group for exhibitors and another one for attendees, and add multiple Registration Options to each Group. You can then hide the exhibitors' registration options from attendees, or vice versa.
Then define your Registration Options that you will allow attendees to select. This can include passes, tickets, physical items, as well as entry to sessions or other activities.
Enter the minimum and maximum quantity available per attendee, as well as the total available quantity.
Define the date range the item will be available for selection.
-
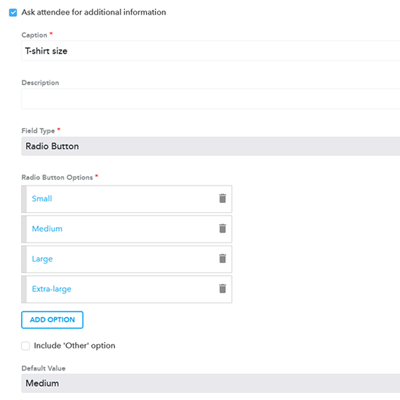
If applicable, define any additional information for the item. For a physical item such as a t-shirt, this could be a list of sizes for the attendee to select from.
-
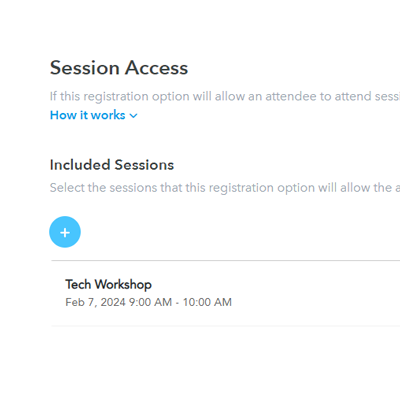
In the Session Access section, select any sessions that are to be included with the Registration Option
-
-
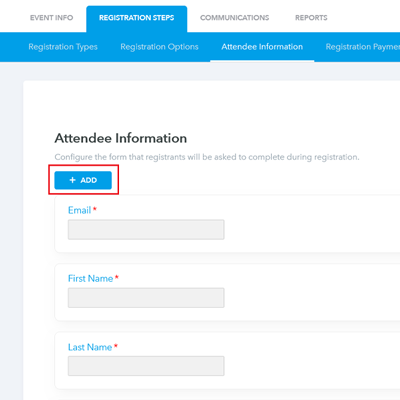
3. Set Up Attendee Information
Attendee Information is where you will build out the form for attendees to complete during registration. Both Form fields and Section Headers can be set as visible only to certain registration types. For example, you can make the tickets section invisible to speakers or sponsors.
-
Click "+ Add" and select Form Field or Section Header
-
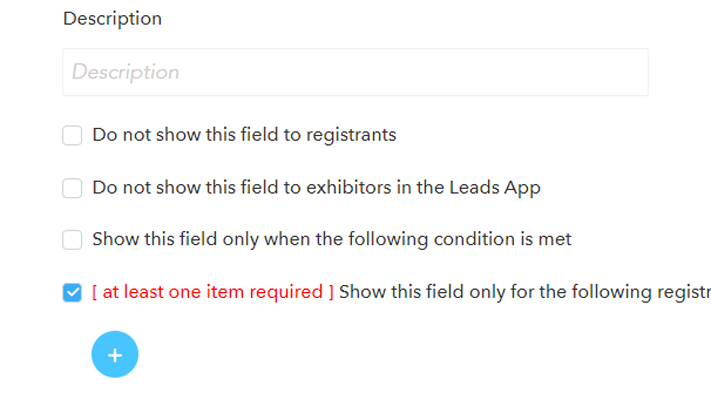
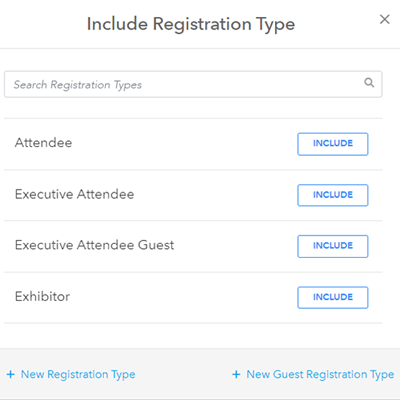
To set a header or field as only visible to a specific subset of attendees, select "Show this field only for the following registration types" and then click the "+" icon.
-
Select INCLUDE for the Registration Types that you want to see the header or field.
-