-
Setting up registration screening, step by step
1. Open the registration settings
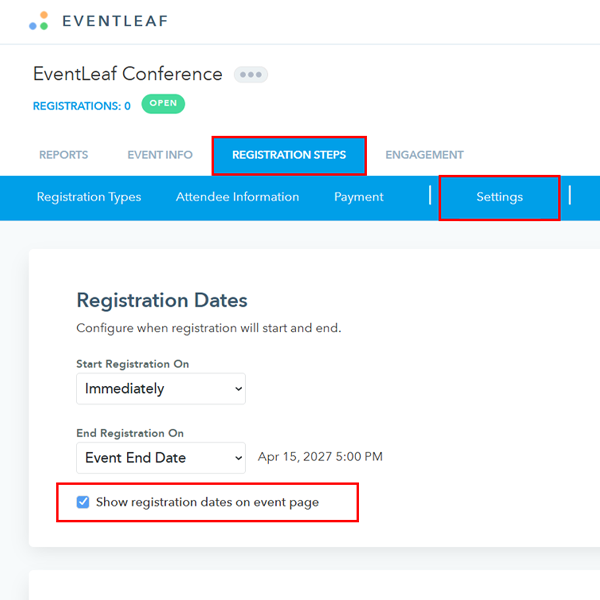
Log in to Eventleaf and click your event. Then, go to Registration Steps › Settings.
2. Turn on screening
Scroll down to the Screening section. Select Screen pending registrations.
From now on, new registrants see this message after they complete the registration process:
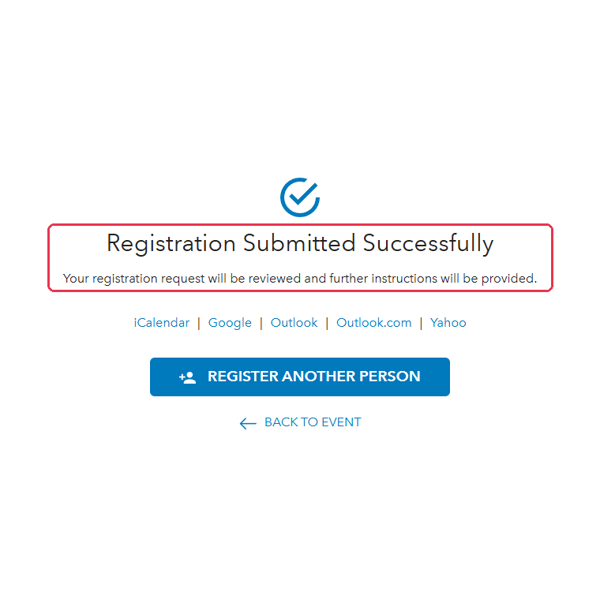
Note: If your event charges a registration fee, registrants pay only after you approve their registration.
3. Set up the screening emails
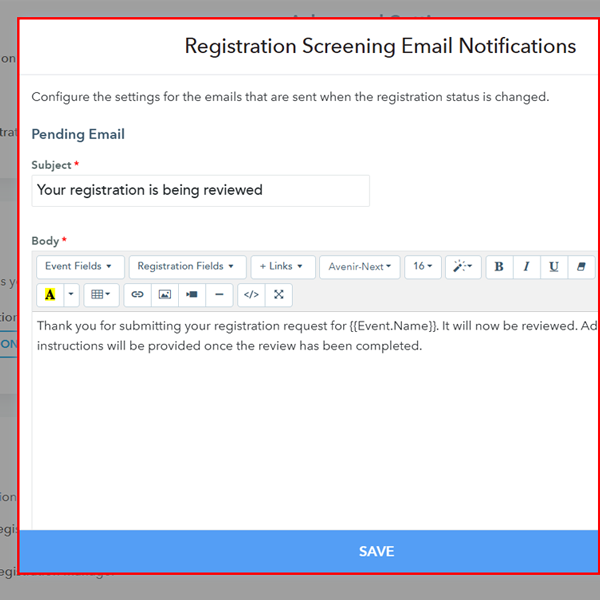
Click CONFIGURE NOTIFICATIONS.
Under Pending Email, check the Subject and Body. Eventleaf sends this email to each new registrant. The default subject is "Your registration is being reviewed."
Scroll down to Denied Email. Select Send email to registrant when request is denied.
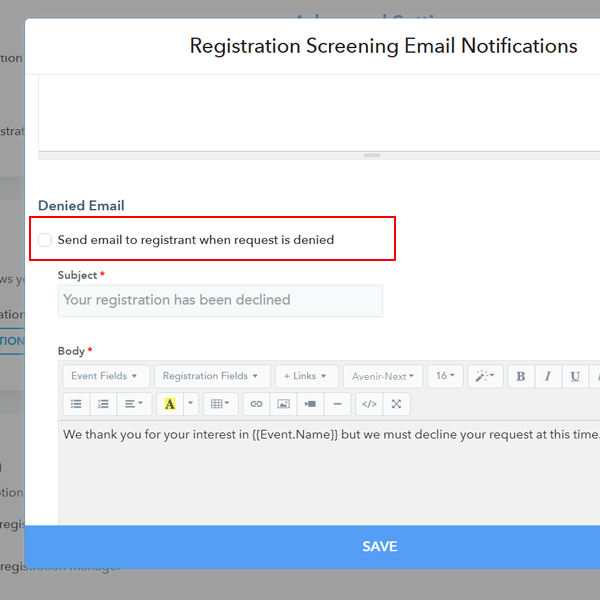
Check the subject and body, then click SAVE.
4. Approve or deny each registration
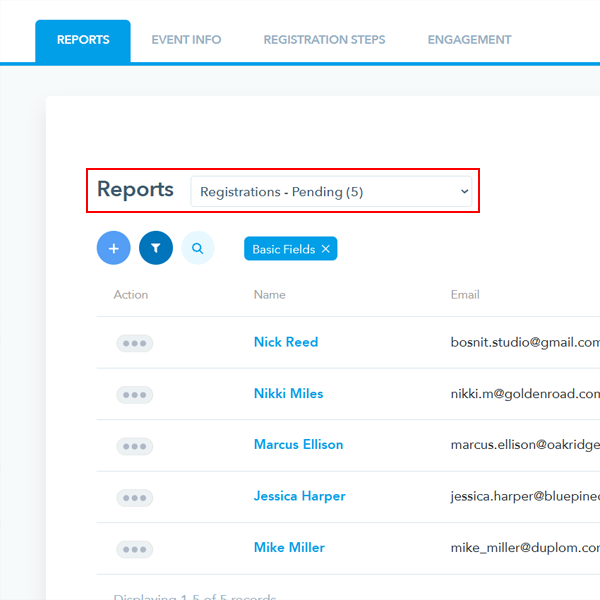
To see who is waiting:
- Click the Reports tab.
- In the Reports dropdown, select Registrations -
Pending.
Approving a registration
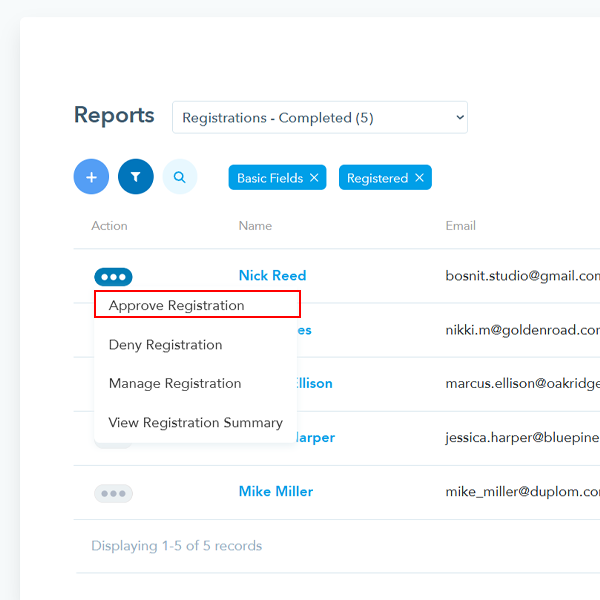
To approve a registration:
- Click the ••• button next to the registrant.
- Click Approve Registration.
- A popup shows the registrant's name and email. Click APPROVE.
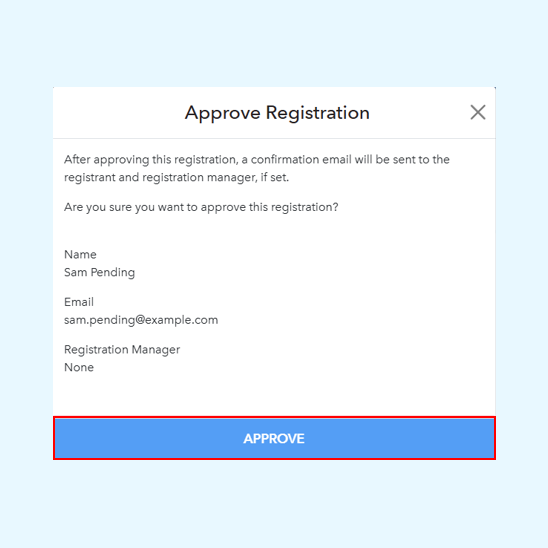
The registration moves to Registrations - Completed. Eventleaf sends the confirmation email to the registrant.
Denying a registration
To deny a registration:
- Click the ••• button next to the registrant.
- Click Deny Registration. Then click DENY in the
popup.
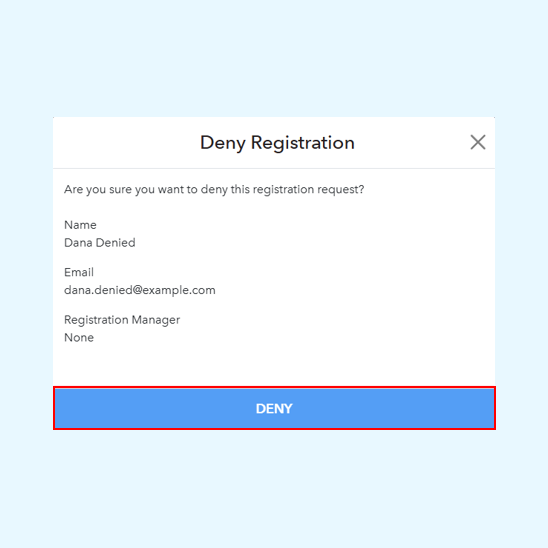
The registration moves to Registrations - Denied. Eventleaf sends the rejection email to the registrant.
That's it. Each new registration now waits for your decision before it is confirmed.
-
Troubleshooting
Problem Fix A denied registrant got no email. The denied email is off by default. In Configure Notifications, select Send email to registrant when request is denied, then click SAVE. The registration total doesn't include pending registrants. This is expected. A registration counts only after you approve it. I denied someone by mistake. In the Reports dropdown, select Registrations - Denied. Click ••• next to the registrant, then click Approve Registration.